Visar inlägg med etikett English patterns. Visa alla inlägg

lördag 10 april 2021

”Bumle-bee”- toiletroll bumble bee free pattern


Terms: US
Hook
3,5 mm
Yarn:  White, yellow and black Carolina (M&K) or other yarn suitable for hook 3,5 mm.
Total usage: approx 80 g.
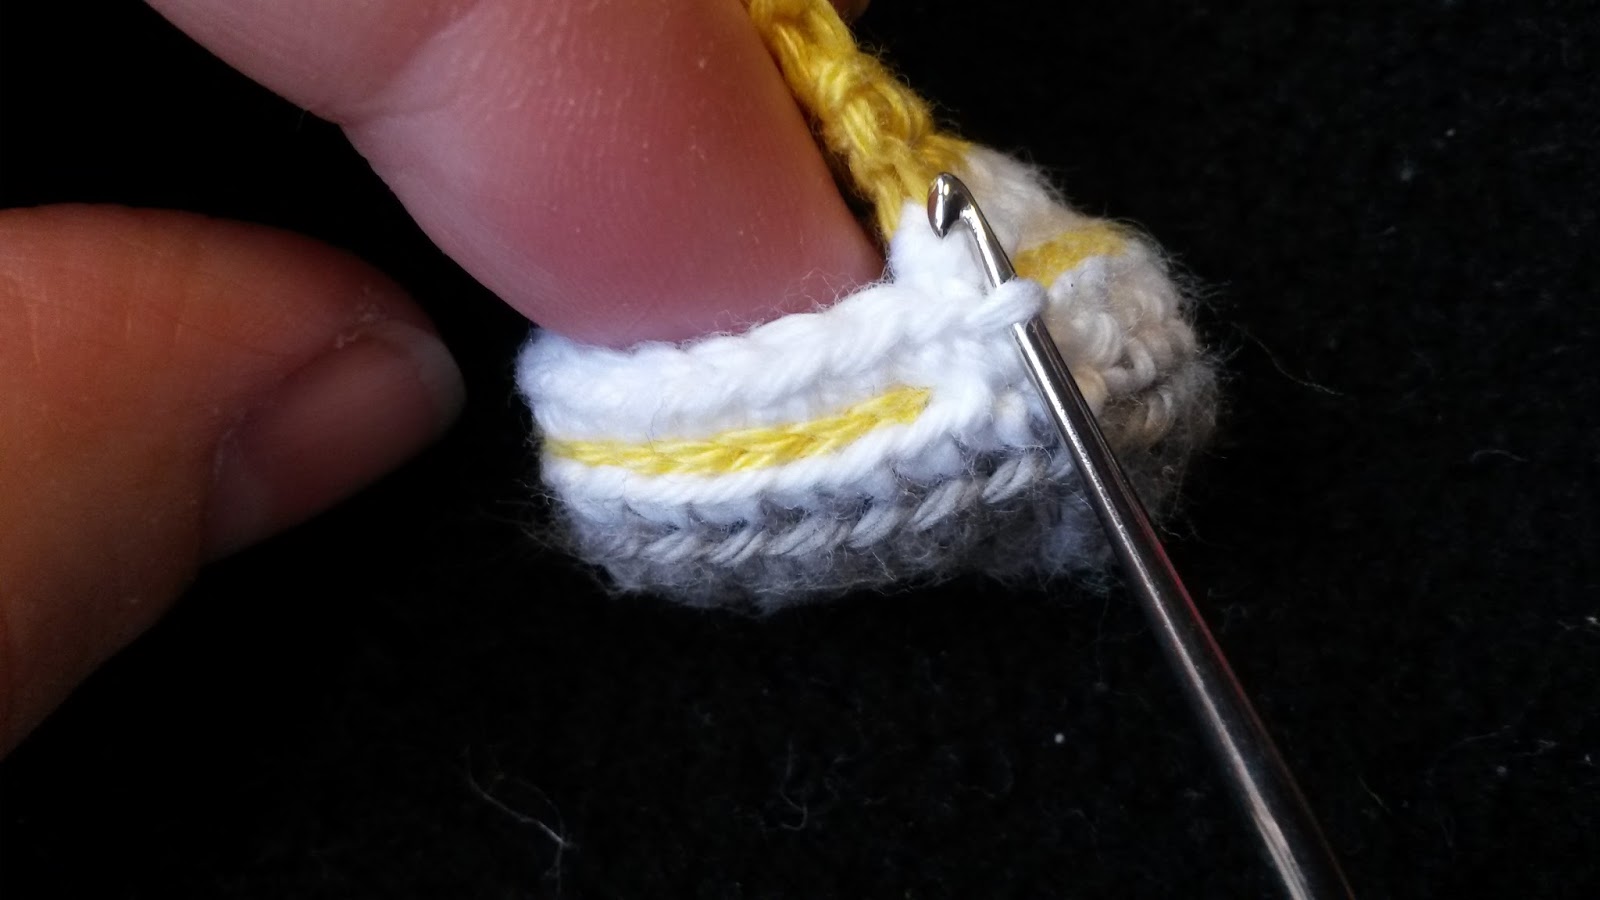
The bumble bee is crocheted down-up with Crochodile Stitches and the rest with hdc. How to make Crocodile Stitches is on my blog, but only in Swedish. However, the photo tutorial is excellent so I think you can figure it out anyway. http://chippzan.blogspot.se/2013/02/crocodile-stitch-steg-for-steg.html

NOTE! Instead of making V-stitches (picture 2-4 in the tutorial) I made like this: * dc 1 in next 2 stiches, ch 1, skip 1 stitch* That is to make it tighter, so the toilet paper won´t show through the holes.  

 Abbreviations:

ch –chain
sc – single crochet
hdc –half double crochet
Cr St – crocodile stitch
dc – double crochet
sl st – slip stitch
st(s) – stitch(es)
tog – together
eor – end of round

Body
Color changes:
Start with white yarn and crochet according to round 1-3. Change to black and crochet round 4-5. Change to yellow and crochet round 4-5. Change to black again, crochet round 4-5. Change to yellow, crochet round 4-5. Finally change to black and crochet the rest of the body from round 6.

1.        Ch 78, form a ring with a sl st in first st.

2.       Trellis/ round with pairs of dc
Ch 3 (=1 dc), dc 1 in next st * ch 1, skip 1 st, dc 1 in each of next 2 sts* repeat *-* until eor, ch 1 and sl st in first dc. (26 pairs of dc)

3.       Crocodile Stitches
Ch 2, start making Cr St in first dc and up the next and continue till end of round. Remember to skip every other pair of dc. When you reach the end, sl st in first the very first dc of Cr St. Break yarn and fasten.

4.       Trellis/ round with pairs of dc
Fasten new yarn in the center of one of the dc pairs that is between two Cr Sts, ch 3 (= 1 dc), dc 1 in the same “hole”* ch 1, dc 2 in the center of Cr St, ch 1, dc 2 st between the 2 dc from previous round* repeat *-* until eor. Finish with a sl st in first ch/dc. (26 pairs of dc)

5.       Crocodile Stitches according to round 3.


Repeat round 4 and 5 until you have 5 rounds of Cr St, ending with a round of Cr St.


6.       The rest of the body is crocheted with hdc and with black.
First round:
Ch 2, hdc 1 in the center of Cr St from previous round *ch 1, hdc 1in ch from prev round, ch 1, hdc 2 between the two dc from prev round, ch 1, hdc 1 in ch, ch 1, hdc 2 in the center of Cr St* repeat *-* and AT THE SAME TIME increase 2 hdc on the round.
(80 hdc)

7.       Make a total of 5-6 rounds of hdc, depending on the hight of your toilet roll (80 hdc/round)

8.       Folding edge
Crochet in the back loops only from now on and do not end with a sl st after each round. Place a marker to mark beginning of round and move the marker as you go.  Just keep crocheting round-round AT THE SAME TIME decreas like this:
* hdc 8, hdc 2 together* until eor.

9.       Continue, without the sl st and ch: *hdc 7, hdc 2 tog.* until eor.

10.   *hdc 6, hdc 2 tog* until eor.

11.   *hdc 5, hdc 2 tog* until eor.

12.   *hdc 4, hdc 2 tog* until eor.

13.   *hdc 3, hdc 2 tog* until eor.

14.   *hdc 2, hdc 2 tog* until eor, sc 1 in next stitch and make a sl st in next to finish of the round. Break yarn and fasten.


Wings, make 2

Ch 25, sl st 1 in very first st, ch 25 and sl st 1 in first st of this last chain. Break yarn and sew/fasten the wings to the sides.


Large eye

1.       Magic ring, sc 6 (6)

2.       Ch 1 * sc 2 in each st* until eor, end with a sl st (12)

3.       Ch 1 *sc 1, sc 2 in next* until eor, end with a sl st. (18)

4.       Ch 1 *sc 1 in next 2 sts, sc 2 in next st* until eor, end with a sl st. (24)

5.       Make the pupil by sewing a few stiches before fastening the eye to the body.

Small eye

Do according to Large eye but skip round 4.


Legs, make 6

Ch 14, sl st 1 in 4th st from hook. Continue with sl sts along the chain until all sts are done. Break yarn.

1.       Top leg is sewn between the two black Cr St under the yellow, see arrow no 1. Fasten on the inside.

2.       Middle leg is sewn between the two yellow Cr St under the black, see arrow no 2. Fasten on the inside.

1.       Last leg is sewn between the two white Cr St under the black and under the middle leg. Fasten on the inside.


Antennas
Ch 17, sl st 1 in 4th st from hook. Continue with sl st along the ch until all sts are done, ch another 17, sl st in 4th st from hook and sl st until all sts are done. You are now at the center of the antennas. Break yarn.  

Fasten the antennas with a pin needle on top of the head, at the center/beginning/end of the antennas. Sew along 3 sts from center and out, a total of about 6 sts along the center. Fasten on the inside.

Instructions
Pull out the hard paper in the center of the toilet roll and pull the bumble-bee onto the roll. This way the paper is pulled from the center - out. It´s perfect for the kitchen, on picnics, in the kids rooms, during cold seasons etc. If the bumble-bee has a tendency to sack when the paper is running low, you can cut a piece of cardboard from eg a pasta box and put inside. Cut a piece that is approx. 10 cm x 40 cm, tape the short ends together around a new toilet roll and put it in the bumble-bee.

Good luck with your toilet roll bumble bee J

No, it´s not ok to sell finished items made from this pattern. You are free to make as many bumble bees as you want to yourself or as gifts. If you wish to sell for charity, no problem at all, just email me and I´ll send you a permission slip. This is because there are bad “apples” out there who do not respect copyright. Thank you for your understanding.

If you want to read more of copyright laws in Sweden please do so at http://www.regeringen.se/content/1/c6/01/22/48/8d08dde0.pdf or on my blog http://chippzan.blogspot.se/p/copyright.html

Any questions, please send me a mail J

Happy crocheting!
/  Petra Söreskog

tisdag 3 januari 2017

Nytt mönster - New pattern

Mössa med flätor och pompom / Beanie with braids and pompom
 
Fick ett underbart garn av grabben i julklapp: 
Malabrigo "Rios", som är ett rent merino ull som går att tvätta (superwash).

I got a lovely yarn from my son for Christmas:
Malabrigo "Rios", pure merino superwash.


Nytt garn innebär inspiration till ett helt nytt mönster :-) Mössan är ribbstickad med flätor, vilket gör den otroligt stretchig så den passar de flesta, både damer och herrar. 

New yarn means inspiration for a new pattern :-). The beanie is knit in rib and braids, which makes is very stretchy, so it fits most ladies and gentlemen.

Garnet ligger på 100 g härvor och räckte till både en mössa och en pompom.   
The yarn comes in 100 grams and is enough for both beanie and pompom.
 Här är mössan taggad med en egen stämplat hjärta :-) 
I stamp my own tags :-)


http://www.ravelry.com/patterns/library/mossa-med-flator


lördag 12 november 2016

Doily made out of scrap yarn


Yarn: scrapyarn in orange, pink, purple, dark blue, green and turqois from Drops (cotton light, paris)
Hook: G/ 4 mm

st - stitch
sc - single crochet
ch -chain
sl st - slip stitch
hdc - half double crochet
dc - double crochet
tr - treble crochet
lp - loop, made from the chain from previous round
2in1 - make two in same stitch.
[text inside clamps are repeated] x 5 - repeat what´s inside [ ] the amount of times shown after.
*-* repeat from first * to last *

Every round ends with a sl st if nothing else is written in the pattern.
1:st sc in round = ch1, sc1in very first st
1st dc in round = ch3

ORANGE
1)  magic ring, dc18 in ring (= 18 dc)
2)  ch3 (=1 dc), dc1 in same st, [dc 2in1] x 17 (=36 dc)
Break yarn.

PINK, fasten the new yarn anywhere on prev. round.
3) *dc3, ch7, sl st 1 in 1:st sc (yes, you´re back at the very first sc again) to form a ring, hdc 9 around the ring* Tip! I make the first hdc directly around the ring.
When last hdc is made, start over from first *. Make 12 rings.
Break yarn.

PURPLE, fasten new yarn in 5th hdc on top of one of the rings.
4)  *sc1, ch 6, skip to next ring*. Repeat *-* all the way around. (=12 loops)
5)  ch 3 (=1st dc), *dc 7 around the loop, dc 1in sc from prev round*. Repeat *-* all the way around. (=96 dc)
Break yarn.

DARK BLUE, fasten new yarn in last stitch
6)  [dc 6, 2in1, dc 7, 2in1] x 5, end round with 6 dc.
7)  [dc 7, 2in1, dc 8, 2in1] x 5, end round with 7 dc.
Break yarn

GREEN, fasten new yarn in last stitch
8)  [dc 8, 2in1, dc 9, 2in1] x 5, end round with 8 dc.
9)  [dc 9, 2in1, dc 10, 2in1] x 5, end round with 9 dc.
Break yarn

TURQUIS, fasten new yarn in last stitch.
10) *dc 3, ch 3, dc 1 in 3:rd ch from hook (= one laying dc), skip 2 st*, repeat *-*.


11) sl st to the chain/laying dc from prev round *sc 1 in loop, ch 2, skip to next loop, [tr 1, ch 3, sc 1 around the top part of the tr] x 4, ch 2, skip to next lp* Repeat *-*.


Break yarn and fasten all ends.

Have fun!

Hashtag items made from my patterns #chippzan or #madebychippzan :) or show them off on my FB page: https://www.facebook.com/MadebyChippzan4U/

fredag 11 november 2016

Cowl with edges


 This is not an exact pattern but a description of how I used the Autumn Warmers and made a cowl to pull over the head. Due to copyright you need to download the pattern for the wristwarmers first, made by Strikkelisa on Ravelry. 


The cowl is first made into a long wonky thing, then folded and knitted together into a cowl.

Download Autumn Warmers and use the pattern with the HOLES and knit row 1-12 but first...
  • skip/remove the "lift first stitch" that is written first on every uneven row.
  • Skip/remove the last "knit2together" on every even rows.
M1 - make 1 by knitting in front and back loop before dropping the stitch from the needle.
DS - doublestitch = lift first stitch on row to the right needle with yarn in front of work, pull the yarn over the needle all the way to the back to create a stitch with 2 "legs". This stitch is counted as 1 and you knit through both "legs" when it´s time to knit it. 

Materials:
  • Needles 4 mm + one extra needle for knitting the work together into a cowl at the end.
  • The redish cowl is knitted in Extra Merino by Schachenmayr and the greyish one is in Delight from Drops. Two totally different types of yarn, I know, but both works and are made with the same size of needles. :-) Obviously the grey one is thinner than the red one.

Let´s get going:
Cast on 9 stitches

1st edge
Row 1) k1, continue as in row 1 according to Strikkelisas pattern
Row 2) row 2 according to Strikkelisas pattern, k1
Row 3) k1, row 3 according to Strikkelisas pattern
Row 4) row 4 according to Strikkelisas pattern, k1
Row 5) k1, M1 (=in first stitch on pattern), continue as in row 5 according to Strikkelisas pattern
Row 6) row 6 according to Strikkelisas pattern, k2
Row 7) k2, row 7 according to Strikkelisas pattern
Row 8) row 8 according to Strikkelisas pattern, k2
Row 9) k2, row 9 according to Strikkelisas pattern
Row 10) row 10 according to Strikkelisas pattern, k2
Row 11) k1, M1, k1, row 11 according to Strikkelisas pattern
Row 12) row 12 according to Strikkelisas pattern, k3

2-5th edge - knit as 1st edge, increase/ M1 1 on row 5 and row 11

6-10th edge - knit the same way but without any increasings.

11-13th edge - increase on every uneven row

14-15th edge - short rows:
Row 2) turn after 6 stitches
Row 3) DS, continue as before
Row 4) knit to the DS, knit the DS as one stitch (the two legs are knitted together as one), k6, turn.
Row 5) DS, continue as before
Row 6) knit all stitches till the end of row

Continue until you´ve made 2 whole edges with short rows.

Now the work looks like this :-) All wonky and uneven.

Fold the work as shown in pic, with the big piece in front.


Fold down the last edge to shape it into a cowl.

Pick up stitches:
Count the stitches on the needle, pick up as many, minus 2 stitches along the edge. Starting in the center of the very first edge.

Knit together and cast off at the same time:
Now hold the two needles together, one in front of the other, with the stitches lining up beside each other and take out the extra needle.
1) Put the extra needle into the first stitch on the front needle as if to knit, BUT continue and put the needle into first stitch on the second needle in the back - yarn over, pull through both stitches, drop the stitches off the needles. = Knit 2 stitches together as one
2) Repeat as above: knit 2 together - one stitch from front needle and one stitch from the back needle. Now you have two stitches on the right needle, lift the very first stitch over the last = cast off 1.

Repeat the knit2together and cast off until all stitches are done. 

Break yarn and fasten the ends.

I think I got everything right, but if you have any questions, don´t hesitate to contact me :-)

Ta da!


tisdag 19 juli 2016

Sharing a pic of a gorgeous shawl made of Pam

With permission from Pam I´m posting the pic she sent me of her gorgeous shawl made of acrylic light worsted and 5 mm hookI just LOVE it! 


It´s much appreciated to recieve emails of your work.

If you want to share your work/pics, just send me an email to 
chippzan9@gmail.com 

or post it on my Facebook 
MADE BY CHIPPZAN page.

Thank you again Pam <3

onsdag 11 maj 2016

Mini converse - FREE PATTERN

Mini shoes 

I´ve noticed that I´ve missed some photos and will update as soon as I get a chance :-) 
The pattern is FREE and finished items can be sold if you choose to, or given away. Do what pleases you but the pattern itself cannot be copied or sold. Feel free to link to this page.
TAG all posts on social networks made with my pattern with: #madebychippzan 
Yarn: Nova from Järbo or similar
I use scrap yarn in grey (sole), white (edge and toe), yellow (the rest of the shoe)
Hook: 1,5 mm
Abbreviations i US terms: ch - chain, sc - single crochet, hdc - half double crochet, dc - double crochet, sl st - slip stitch, st(s) - stitch(s)
Soles (grey)
  1. ch 9, dc 6 in 4th ch from hook, hdc 4, [hdc 1, dc 3, hdc 1] in last ch. Turn your work and continue to crochet along the other side of the chain: hdc 4, end row with a sl st. [20]
  2. ch 1 (does not count), ch 1 in first st, sc 1, sc 2 in next st, sc 2, sc 2 in next st, sc 6, sc 2 in next st, sc 1, sc 2 in next st, sc 5, end row with a sl st. [24]
Break yarn and fasten ends.
1
ch 9...


...dc 6 in 4th ch from hook...
...hdc 4...
... in last st: hdc 1, sc 3, hds 1...
Continue along the other side: hdc 4, ending round with sl st. 
Round 2
ch 1, sc 1 in first st, sc 1 in next st...
..., sc 2in1, sc 3, sc 2in1, sc 6,
sc 2in1, sc 1, sc 2in1, sc 5, sl st.

Edge (white)
Fasten yarn in back loop in last stitch you made with grey.

  1. ch 1, sc 1 in the same st you fasten the yarn, continue with sc in back loop through out the round. Ending with a sl st through both loops [24 fm]
  2.  ch 1, sc 10 (through both loops), sc 14 in back loops, sl st in back loop.

Round 1
Fasten yarn in back loop, in last st you made with grey.
Ch 1, sc 1 in same st...
...sc 1 in back loops through out the round.
End round with a sl st through both loops.
Round 2
ch 1, sc 1 in same st, sc 10, sc 14 in back loop...
...sl st in back loop.
Toe
  1. sc 1 in next st, [sc 2 together] 3 times, sc 1, sl st 2. Turn.
  2. Skip 1 st, sc 1, hdc 2, sc 1, skip 1 st, sl st.
Break yarn and fasten all ends.


This is how it should look like :-)

Decorations - slip stitches along the edge and toe.

Separate yarn so you have two strands instead of four.

Push in the hook from the outside-in, where the first strand of the sc lies
 on the outside of the edge, (made from round 2), just after the toe. 
Pick up the yarn from the inside and pull out.

Make slip stitches along the side by putting the hook one st forward,
picking up yarn from the inside and pull through.

Do the same over the toe. Fasten all ends.
Tongue (yellow)
Fasten yarn to the right, toe facing you.

  1. chain 1, sc 1 in same stitch, sc 4. Turn.
  2. ch 1, sc 5. Turn.
  3. ch 1, sc 5. Turn.
  4. ch 1, sc 5. Turn.
  5. ch 1, sc 5. Break yarn and fasten ends.

Fasten yarn to the right, toe facing you.


Sc 5 along the edge...
 
...back and forth, 5 times.
Shoe (yellow)

With toe facing to the right, fasten yarn on the side of the shoe in one of the outside loops, counting 2 stitches from the opening towards the toe.

  1. ch 1, sc 1 in the same stitch, sc 1 in next loop, sc in back loops only along the edge of the shoe from one side to the other, ending with 2 sc in the two loops on the outside of the toe, as in the beginning of the round. Turn.
  2. ch 1, sc 2 together, sc till the back/heel of the shoe, sc 2 together, sc until you have 2 stitches left on the round, sc 2 together. Turn.
  3. ch 1, sc 2 together, sc until you have 2 stitches left on the round, sc 2 together. Turn.
  4. ch 1, sc till end of round. Turn.
  5. ch 1, sc till end of round. Break yarn and fasten ends. 

 1
Fasten yarn in the loop on the outside, ch 1, sc 1 in the same stitch,
sc 1 in next loop, sc in back loops only along the edge of the shoe,
from one side to the other... 

...sc 2 in the loops on the outside of the toe as in the beginning. Turn.

Laces
I even "lace" my shoes through the tongue, by pulling the laces through two of the threads in the 3:rd sc (center) on last row on tongue :-)


tisdag 1 december 2015

Tutorial on how to make a trivet with rice and cloves


This is how I make my trivets for pans. They are filled with rice and cloves or crushed cinnamon rod and smells amazing! Finished size is approx 19x19 cm.

You need:
  • heavy cotton fabric, cut in 42 x 21 cm
  • approx 3,5 cups (parboiled)
  • funnel or homemade out of paperboard from a toilet roll
  • cloves, cinnamon rod, lavendel or another spice or herb that you prefer - optionally
  • tag - optionally


Cut fabric: 42 x 21 cm
Optional: Zigsag around the piece.
I chose not to do it in this TUT ´cause it´s for my
 use and I wanted to take a short cut (call me lazy) 
Fold it, right sides in...

... and sew the sides. I stop about an inch from the top. 
Cut the corners...

...turn and straight out the corners.
(I use a chopstick)

Press and pin.

Top stitch around the sides and bottom (the folded side). 
Leave the top/opening as it is. 

On my machine I have a special reinforced seam -
it makes it possible to sew three (3) stitches at the same

 time (marked red).

If you don´t have a similar stitch I would recommend
that you sew 2-3 times in the same track, back and forth, 

when you make the channels.


Fold your work in the center, let the side seams meets on
one side. Pin or draw along the folded side.


Open up...

...and sew along the marked center. 
Stop 1 inch from the top edge as you did on the sides.
Now you have two channels.

Fold one sideseam towards the center seam, 

pin or draw along the folded side...

...open up and sew along the marking.
Do the same on the other side of the center. My trivet now

 has 4 channels but you can make as many as you like.

Of course you can use measuring tape and measure out these

lines. I just think it´s easier and faster to do it this way. LOL

Now, if you have a funnel just skip this part.
I don´t have one so I made a small one out of cardboard 

from a toilet roll and drew two lines...

...cut out the piece...

...and used tape to close the gap.

Voila! A paper-funnel LOL Not a fancy one,
but hey! it works just fine.


Start on one side and fill one channel at a time. I pour rice with a small medicine cup and squeeeese the bottom of the channel once in a while to make sure the rice fills the bottom. I stop filling when it reaches 2/3 of the channel. That´s enough for me, maybe you prefer more or less? 

I use regular parboiled rice + cloves or crushed cinnamon rod. It smells amazing, the heat from the pan activates the cloves/cinnamon! I think it´s enough with 2-3 cloves in each channel but that´s just my opinion. The cinnamon rod I usually crush lightly. Maybe it works with crushed cardamom seeds as well, or lavender or other herbs/spices? If you have experimented and have tips on what to use, please let me know. 

I tried to pour rice without my funnel first but more rice ended up on the table than inside the channel, so for me this works better.  


Well, when it´s filled up to 2/3 I press the channel closed 
with my fingers and pin a needle  where the rice reaches
This is to keep the rice contained while I fill up 
the rest of the channels. It also minimizes the risk of getting
rice grains along the top edge when it´s time to close it up. It´s not
fun to sew over a lost rice grain, especially when you least espect it!

When all the channels are filled and has it´s "stopping-pin"
it´s time to focus on the top edge. Fold the edges and pin pin pin. 

Make sure no rice grains are on the loose.

This is also the time I put my tag in but you can use a cotton
strip if you want to be able to hang it up. Optional of course.

Sew the last side with the reinforced seam too. 
Remember to sew along
the corners if you stoped sewing an inch from the top
so no openings are left.


Finished!

I hope you enjoyed this TUT.

Sell, give away or make a pile for yourself!